our kitchen is slowly coming together. ikea cabinets assembly is pretty simple. however, our kitchen cabinets came with 8" tall legs instead with 4" ones we ordered. that would put our counter top way too high, not saying it would be higher than window sill. so we spent half day figuring out how to modify 8" legs to a shorter size. in the end we used simple tool for cutting copper pies.

framed wall in front of peninsular cabinets is mainly for wiring purposes, but also will cover back of the cabinets. plywood on top of cabinets serves as underlayment under counter tops.

kitchen cabinets all in place. drawers and doors will be installed later. we also started to work on templates for concrete counter tops. i used hardboard material to slice strips and created template that included sink, cook top, faucet and outlet locations. since we are doing counter tops upside down, templates had to be flipped when creating forms.

forms cut out of melamine, with reinforcement and knockout panels in place. steel will be taken out when pouring and put back so it sits in 1/3rd of counter top thickness from the top. it will be actually in 1/3rd of thickness from the bottom when we flip them over.
peninsular piece is huge, it took 6 of 80 pounds concrete bags. after the form was full, we screeded it with 2x4 and let it sit for an hour before hard troweling it. smaller counter top ate 4 bags and side curtain 2 bags of concrete mix. for concrete mix we used quickrete 5000, with addition of super plasticizer. to eliminate micro cracking we added polypropylene fibers.

hard troweling the surface.

all troweled and ready to cure.

as we dont have time to wait a week or so for concrete to cure, we removed forms the next day.

3rd day from pour, we flipped smaller counter top over. the surface is really smooth from melamine form surface and even though we quite vibrated the forms with sander while pouring, there are still little voids that will need to be filled with slurry.
applying slurry.


counter tops ready to be ground.

also saturday we started on north side siding.
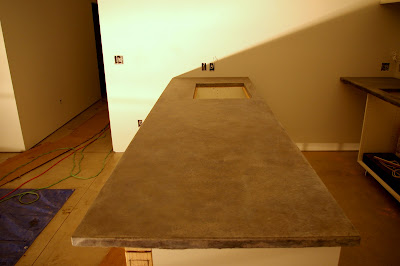
 countertops in place. not sealed yet.


 our kitchen is slowly coming together. ikea cabinets assembly is pretty simple. however, our kitchen cabinets came with 8" tall legs instead with 4" ones we ordered. that would put our counter top way too high, not saying it would be higher than window sill. so we spent half day figuring out how to modify 8" legs to a shorter size. in the end we used simple tool for cutting copper pies.
  framed wall in front of peninsular cabinets is mainly for wiring purposes, but also will cover back of the cabinets. plywood on top of cabinets serves as underlayment under counter tops.
 kitchen cabinets all in place. drawers and doors will be installed later. we also started to work on templates for concrete counter tops. i used hardboard material to slice strips and created template that included sink, cook top, faucet and outlet locations. since we are doing counter tops upside down, templates had to be flipped when creating forms.
 forms cut out of melamine, with reinforcement and knockout panels in place. steel will be taken out when pouring and put back so it sits in 1/3rd of counter top thickness from the top. it will be actually in 1/3rd of thickness from the bottom when we flip them over.
  hard troweling the surface.
 all troweled and ready to cure.
 as we dont have time to wait a week or so for concrete to cure, we removed forms the next day.
 3rd day from pour, we flipped smaller counter top over. the surface is really smooth from melamine form surface and even though we quite vibrated the forms with sander while pouring, there are still little voids that will need to be filled with slurry.
 jana applied second coat of sealer today, giving floors some kind of wet look. it will protect concrete from absorbing liquid spills, and will help to clean it easier. contrlo joints will be eventually filled with contrasting grey joint compound.
 we manage to complete substantial portion of siding. we had to redo north and east garage side, and managed to complete whole south side. bottom portions are still left uninstalled, but except that, garage is done. now the biggest portion left is back of the house where siding goes up to 12'.


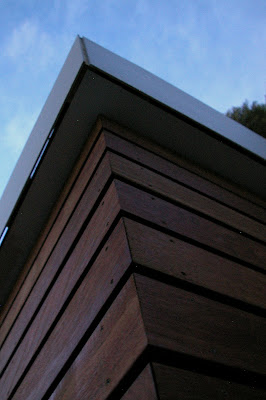
 in addition to hardie board siding, we are using brazilian mahagony hardwood. we are installing it with open joints to create vented rainscreen. couple rows at the bottom are not installed yet so they dont get damaged, as we are still waiting for excavation sub to install perimeter drain.
 boards need to be countersunk pre-drilled prior to atachement. we are using brown coated ss screws to attach to verticals.
 we assembled all kitchen cabinets this saturday. doors and drawers will be installed later, after cabinets are in place and countertop is in place. our friend tomas helped us to manage this in one day.